Summary: Description of finished robot controls.
Timing the controls to be automated is creating issues because the batteries and being drained, and therefore slowing down the motors, and changing the timing.
To combat this instead of Butlerbot controlling himself, he can be controlled over the USB cable via a computer. This requires two codes: one that runs on the arduino board and operates the motors based on what it receives, and another that runs through Processing on the computer to send the inputs.
In terms of a power system, we should plan on plugging it into the wall with our 12V 850mA adapter, instead of the batteries, simply because the extra boost allows it to climb more smoothly.
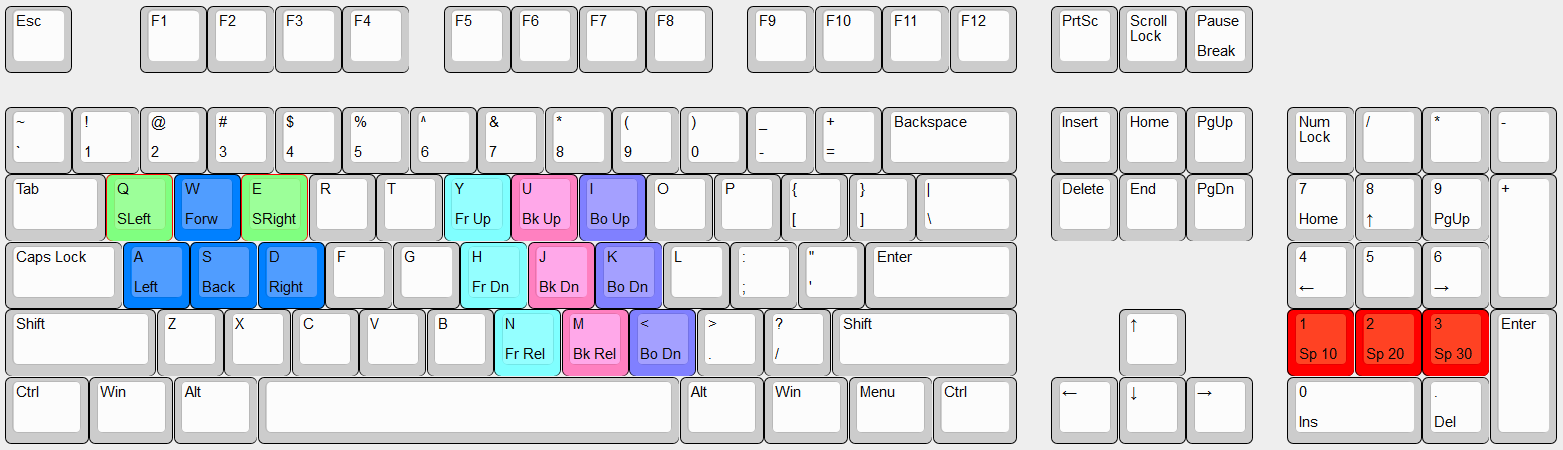
Keyboard control layout is:
WASD keys control the general movement, with QE to provide minor adjustments to it alignment.
YUI make the robot lift on the racks, HJK make the robot lower, and NM"," releases the stepper motors.
It has three travel speeds: 10, 20, and 30 that are keyed in by the number pad.
Full Arduino Code:
***********************************************
//Includes libraries
#include <Wire.h>
#include <Adafruit_MotorShield.h>
#include "utility/Adafruit_PWMServoDriver.h"